
System requirements
CPU: Dual Core
RAM: 4GB
GPU: 500mhz
VRAM: 512MB
The game has community support since going open source, however Quake Live has superseded its features and it would be better to make the switch.
Onboarding
- Purchase Quake 3 on Steam or GoG, keep an eye on the specials.
- Download the game.
- Download Quake3e (Windows users - use quake3e-windows-msvc-x86_64.zip
) and extract contents into your Quake 3 folder.
Note: You may have to whitelist the .exe as it may trigger false alerts such as IDP.ALEXA.54
Optional Mirror - Inside your Quake 3 folder, Run
quake3e.x64.exe - Configure your controls, graphics and player name.
CD Media
- Create a folder Called Quake 3
- Download Quake3e and extract contents into your Quake 3 folder.
- Put in you Quake 3 CD or Media, and copy pak0.pk3 into your
Quake 3\Baseq3folder - Download the patched pak files, scroll all the way down and click Agree, If the link is dead, try this one Q3A Point Release 1.32 and Essential files - ..::LvL - Quake 3 Arena Maps (Q3A Custom Maps) and download the pak files only
- Download Quake3e (Windows users - use quake3e-windows-msvc-x86_64.zip) and extract into your Quake 3 Folder.
Note: You may have to whitelist the .exe as it may trigger false alerts such as IDP.ALEXA.54
Optional Mirror - Inside your Quake 3 folder, Run
quake3e.x64.exe - Configure your controls, graphics and player name.
Tweaks
Turn off weapon auto pickup
While inside the game
- Bring down console ~ type in
cg_autoswitch 0, press enter
Network performance
For smoother movement and gun response, tweak the network settings.
While inside the Quake 3 main menu bring down console ~ type in
rate 25000, then press entercom_maxfps 125, then press entercl_maxpackets 100, then press enter
Achieving higher resolutions
Out of the box, the GUI doesn’t allow for 1440p, 2K and 4K resolutions. The workaround is to manually specify the resolution.
In the Quake 3 Main Menu, bring down the console ~ and type in and press enter per line
4K or 3840x2160
\r_customwidth 3840
\r_customheight 2160
\r_customaspect 1
\r_mode -1
\vid_restart
1080p or 1920x1080
\r_mode -1
\r_customwidth 1920
\r_customheight 1080
\vid_restart
1440p / 2560x1440
\r_mode -1
\r_customwidth 2560
\r_customheight 1440
\r_customaspect 1
\vid_restart
1440p / 3440x1440
\r_mode -1
\r_customwidth 3440
\r_customheight 1440
\r_customaspect 1
\vid_restart
Tweak FOV
You may tweak the FOV by running one of the console commands below, experiment with higher first
\cg_fov 75
\cg_fov 90
\cg_fov 100
\cg_fov 110
\cg_fov 120
Eyefinity or Multiple Screens
In the Quake 3 Main Menu, bring down the console ~ and type in and press enter per line
3840x1620
\r_mode -1
\r_customwidth 3840
\r_customheight 1620
\vid_restart
2560x1620
\r_mode -1
\r_customwidth 2560
\r_customheight 1620
\vid_restart
2048x1536
\r_mode -1
\r_customwidth 2048
\r_customheight 1536
\vid_restart
Tweak FOV
You may tweak the FOV by running one of the console commands below, experiment with higher first
\cg_fov 75
\cg_fov 90
\cg_fov 100
\cg_fov 110
\cg_fov 120
Optional Mods
Challenge ProMode Arena
Also know as CPMA, comes with Clan arena, freeze tag, Threewave CTF and Instagib
Download the mod https://cdn.playmorepromode.com/files/cpma/cpma-1.53-nomaps.zip, unzip into your Quake 3 folder
Download the maps https://cdn.playmorepromode.com/files/cpma-mappack-full.zip, unzip into your Quake 3\baseq3 folder
To play
- Launch
quake3e.x64.exe - In the Quake 3 Main Menu, select Mods and select CPMA, click load.
- The Screensize will be squished, you cannot fix this.
- Click Play online and join a CPMA enabled server.

Hosting Quake 3
The best way to host is by configuring server files ahead, then use quake3e.ded.x64.exe to call the config file,
GUI
Hosting Quake 3 through the GUI will kick you out of the GUI and launch the dedicated instance, you will have to open Quake 3(quake3e.x64.exe) again to join the server.
In the Quake 3 main menu
- If you’re not at the DadLAN event, connect to Wireguard
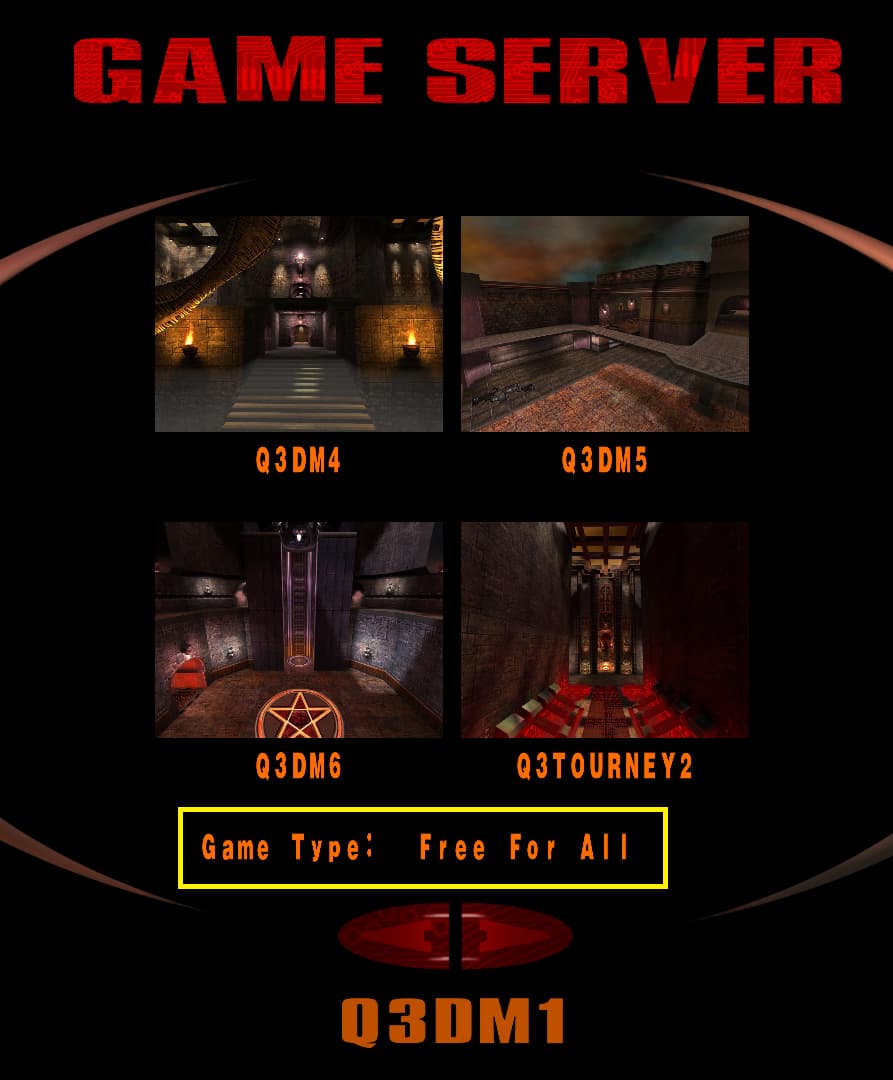
- Click Multiplayer & Click Create.
- Pick the map & mode desired.
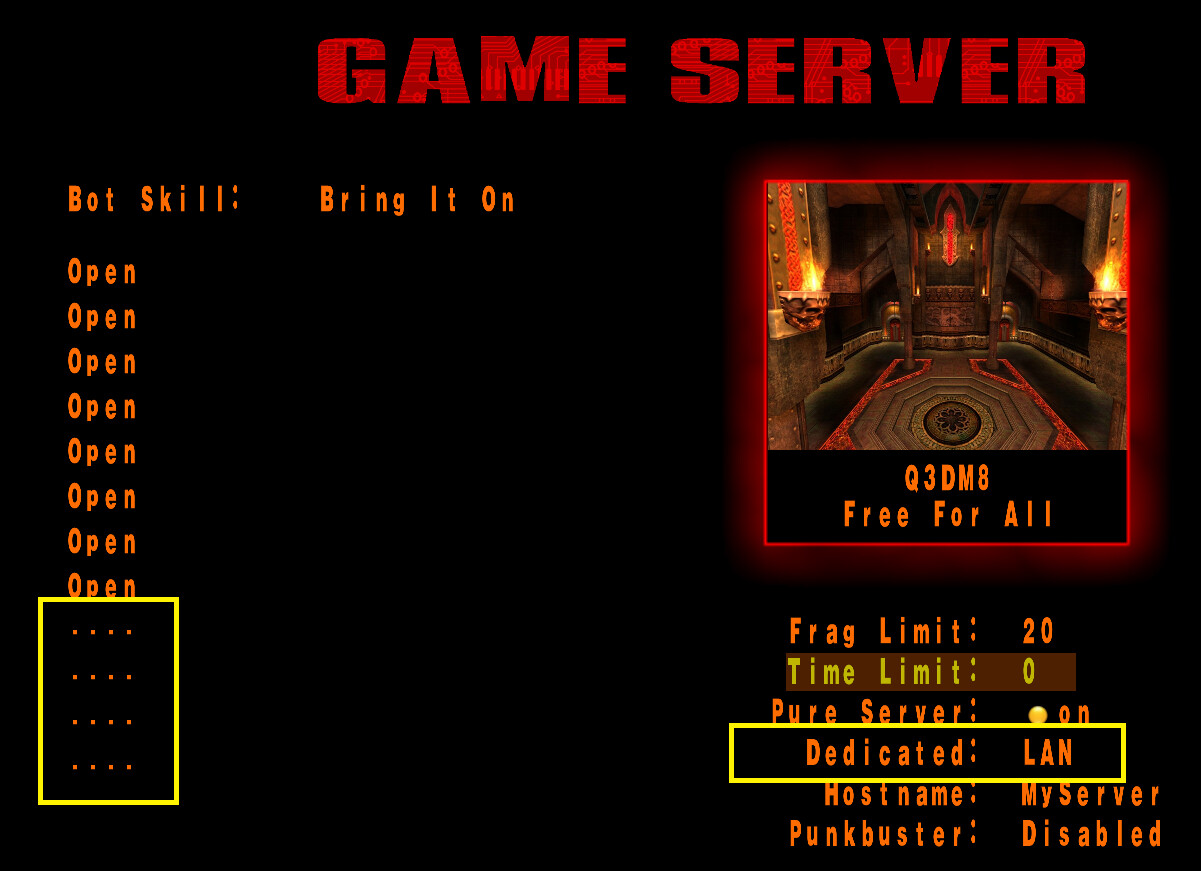
- Configure bots if desired, open more slots for players to join
- Set the server name, set time and score/frag limit, select LAN
- Click Create, this will close Quake 3 and run a dedicated instance.
- To join the server you’ve created, launch
quake3e.x64.exe, click multiplayer and Join your server - Announce/share the IP in discord chat.
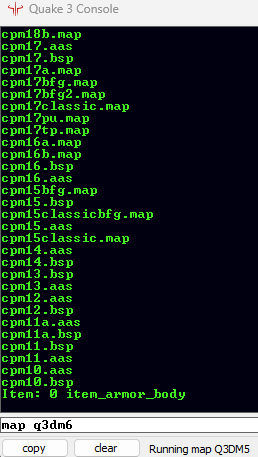
Note: The server will be stuck on the same map after someone wins the game, you will have to manually change the map in the dedicated instance window, by typing in
map q3dm6 or the map desired from q3dm1-q3dm19
You can see a list of maps by typing in
dir maps bsp
Dedicated Free for All Instance
- If you’re not at the DadLAN event, connect to Wireguard.
- Inside the Quake 3 folder, got into
baseq3and create a text file calledFFA.cfg
Copy and paste the code below, make any changes you like, such as password.
// Server Settings
seta rconpassword "secret"      // sets RCON password for remote console
seta g_gametype 0
seta sv_hostname "MyServer"
seta sv_fps 30
// 0: deathmatch (free for all)
// 1: one on one (tournament)
// 2: not available in multiplayer
// 3: team deathmatch
// 4: capture the flag

//Bots
seta bot_enable 1
seta g_spskill "3"
seta bot_nochat "1"
seta bot_minplayers 4

//Game Settings
seta sv_pure 1
seta fraglimit 30
seta capturelimit 5
seta sv_maxclients "12"
seta sv_maxclientsPerIP "12"
seta g_warmup "10"

// Weapon Spawn setting
seta g_weaponspawn 1
exec ffa-maps.cfg
Save the file
- Inside the baseq3 folder, create a text file called
ffa-maps.cfg
Copy and paste the code below, make any changes you like,
// The only way to make a map cycle is the workaround below
set map1 "map q3dm2; set nextmap vstr map2"
set map2 "map q3dm3; set nextmap vstr map3"
set map3 "map q3dm4; set nextmap vstr map4"
set map4 "map q3dm5; set nextmap vstr map5"
set map5 "map q3dm6; set nextmap vstr map6"
set map6 "map q3dm7; set nextmap vstr map7"
set map7 "map q3dm8; set nextmap vstr map8"
set map8 "map q3dm9; set nextmap vstr map9"
set map9 "map q3dm10; set nextmap vstr map10"
set map10 "map q3dm11; set nextmap vstr map11"
set map11 "map q3dm12; set nextmap vstr map12"
set map12 "map q3dm13; set nextmap vstr map13"
set map13 "map q3dm14; set nextmap vstr map14"
set map14 "map q3dm15; set nextmap vstr map15"
set map15 "map q3dm16; set nextmap vstr map16"
set map16 "map q3dm17; set nextmap vstr map17"
set map17 "map q3dm18; set nextmap vstr map18"
set map18 "map q3dm19; set nextmap vstr map1"
vstr map1
Save the file
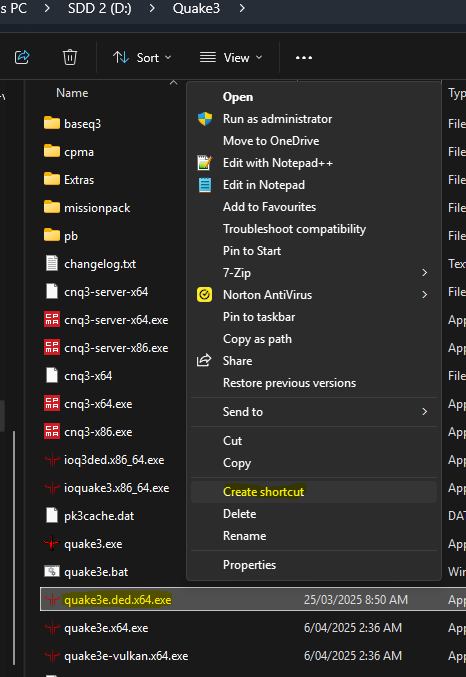
- Inside your Quake 3 folder, right click quake3e.ded.x64.exe and create a shortcut (more options).
- Edit the Shortcut Name, call it
Start Quake 3 Server - FFAor whatever desired name.
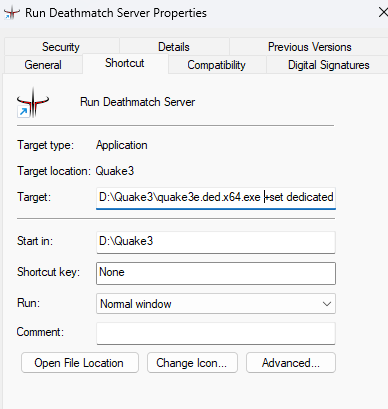
- Click shortcute Tab, at the end of target put a space and copy & paste in
+set dedicated 1 +set sv_allowDownload 1 +set net_port 27960 +com_hunkMegs 1024 +exec ffa.cfg
- Launch Shortcut to host and announce/share the IP in discord chat.
Dedicated Team Deathmatch instance
- If you’re not at the DadLAN event, connect to Wireguard.
- Inside the Quake 3 folder, got into
baseq3and create a text file calledTDM.cfg
Copy and paste the code below, make any changes you like, such as password.
// Server Settings
seta rconpassword "secret"      // sets RCON password for remote console
seta g_gametype 3
seta sv_hostname "MyServer Team Deathmatch"
seta sv_pure 1
seta sv_fps 30
// 0: deathmatch (free for all)
// 1: one on one (tournament)
// 2: not available in multiplayer
// 3: team deathmatch
// 4: capture the flag

//Bots
seta bot_enable 1
seta g_spskill "3"
seta bot_nochat "1"
seta bot_minplayers 4

//Game Settings
seta g_warmup "10"
seta fraglimit "30"
seta capturelimit "5"
seta sv_maxclients "12"
seta sv_maxclientsPerIP "12"

// Weapon Spawn setting
seta g_weaponspawn 1
exec ffa-maps.cfg
Save the file
- Inside the baseq3 folder, create a text file called
ffa-maps.cfg
Copy and paste the code below, make any changes you like,
// The only way to make a map cycle is the workaround below
set map1 "map q3dm2; set nextmap vstr map2"
set map2 "map q3dm3; set nextmap vstr map3"
set map3 "map q3dm4; set nextmap vstr map4"
set map4 "map q3dm5; set nextmap vstr map5"
set map5 "map q3dm6; set nextmap vstr map6"
set map6 "map q3dm7; set nextmap vstr map7"
set map7 "map q3dm8; set nextmap vstr map8"
set map8 "map q3dm9; set nextmap vstr map9"
set map9 "map q3dm10; set nextmap vstr map10"
set map10 "map q3dm11; set nextmap vstr map11"
set map11 "map q3dm12; set nextmap vstr map12"
set map12 "map q3dm13; set nextmap vstr map13"
set map13 "map q3dm14; set nextmap vstr map14"
set map14 "map q3dm15; set nextmap vstr map15"
set map15 "map q3dm16; set nextmap vstr map16"
set map16 "map q3dm17; set nextmap vstr map17"
set map17 "map q3dm18; set nextmap vstr map18"
set map18 "map q3dm19; set nextmap vstr map1"
vstr map1
Save the file
- Inside your Quake 3 folder, Right click quake3e.ded.x64.exe and create a shortcut (more options)
- Edit the Shortcut Name, call it Start Quake 3 Server - TDM
- Click shortcut Tab, at the end of target put a space and copy & paste in
+set dedicated 1 +set sv_allowDownload 1 +set net_port 27961 +com_hunkMegs 1024 +exec TDM.cfg - Launch Shortcut to host and announce/share the IP in discord chat.
Dedicated CTF Instance.
- If you’re not at the DadLAN event, connect to Wireguard.
- Inside the Quake 3 folder, got into
baseq3and create a text file calledCTF.cfg
Copy and paste the code below, make any changes you like, such as password.
// Server Settings
seta rconpassword "secret"      // sets RCON password for remote console
seta g_gametype 4
seta sv_hostname "MyServer CTF"
seta sv_pure 1
seta sv_fps 30
// 0: deathmatch (free for all)
// 1: one on one (tournament)
// 2: not available in multiplayer
// 3: team deathmatch
// 4: capture the flag

//Bots
seta bot_enable 1
seta g_spskill "3"
seta bot_nochat "1"
seta bot_minplayers 4

//Game Settings
seta g_warmup "10"
seta fraglimit 30
seta capturelimit 5
seta sv_maxclients "14"
seta sv_maxclientsPerIP "14"

// Weapon Spawn setting
seta g_weaponspawn 1
exec CTF-maps.cfg
Save the file
- Inside the baseq3 folder, create a text file called
CTF-maps.cfg
Copy and paste the code below
// The only way to make a map cycle is the workaround below
set map1 "map q3ctf1; set nextmap vstr map2"
set map2 "map q3ctf2; set nextmap vstr map3"
set map3 "map q3ctf3; set nextmap vstr map4"
set map4 "map q3ctf4; set nextmap vstr map1"
vstr map1
Save the file
- Inside your Quake 3 folder, Right click quake3e.ded.x64.exe and create a shortcut (more options)
- Edit the Shortcut Name, call it Start Quake 3 Server - CTF
- Click shortcut Tab, put a space and copy & paste
+set dedicated 1 +set sv_allowDownload 1 +set net_port 27962 +com_hunkMegs 1024 +exec ctf.cfg - Launch Shortcut to host and announce/share the IP in discord chat.
CPMA Instagib
Before proceeding, this requires to download the CPMA mod as mentioned earlier in the article
- If you’re not at the DadLAN event, connect to Wireguard
- Download the CPMA Executables and extract into your Quake 3 folder.
- Navigate to
Quake 3\CPMAfolder and create aiffa.cfgtext file
Copy and paste the code below, you may make your own changes
// MOTD
//set server_motdfile motd.cfg

// Public info
//sets ".discord" "www.discord.me/CPMA"

// General
set sv_hostname "InstaGib Server"
set sv_allowdownload 0
set sv_floodprotect 0
set sv_pure 1
set sv_fps 30
set sv_strictAuth 0
//set net_port 27960
//set com_hunkmegs 256
set sv_allowdownload 1
set g_warmup "10"

//set sv_master1 "master3.idsoftware.com"    //ID Master Server
//set sv_master2 "master0.gamespy.com"       //Gamespy Master Server
//set sv_master3 "clanservers.net"

set sv_maxclients 16
set sv_privateclients 2
set g_maxGameClients 0

set sv_maxrate "25000"
set server_maxpacketsmin "60"
set server_maxpacketsmax "125"
set server_ratemin "12000"
set server_timenudgemin 0
set server_timenudgemax 50
set server_realping 1
set server_chatfloodprotect 0
set server_optimiseBW 1
set server_record 1

// Bots
set bot_enable 0
set g_spskill "3"
// set bot_nochat "1"
// set bot_minplayers "4"

// Logging
set g_log "server.log"
set admin_log "server_admin.log"

// rcon/Referee password
set rconPassword "myrcon"
set ref_password "myrefpassword"
set sv_privatepassword ""
//set g_needpass 1
//set g_password ""

// Allow votes
//set vote_allow_gameplay "0"
set vote_allow_referee "0"
//set vote_allow_overtime "0"
//set vote_allow_timelimit "0"
set vote_percent 51

set team_allcaptain 1
set allcaptain 1

// Mode settings
set mode_start "IFFA"
// other Valid modes
// CA = Clan Arena
// FT = Freeze Tag
// FFA = Free for all
// ICTF = InstaGib CTF
// FTAG = Freeze Tag with alternate settings
set mode_idletime "10"
set server_availmodes ""

set match_readypercent "100"
// mode iffa
map cpm3a
Save the file
- In your Quake 3 folder, right click
cnq3-server-x64.exeand select create shortcut (more options) - Edit the new shortcut, Label the shortcut
Start CPMA Instagib
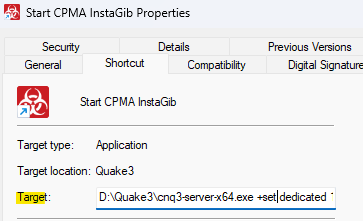
- Click shortcut, at the end of target, put a space and paste in
+set dedicated 1 +set sv_allowDownload 1 +set net_port 27962 +com_hunkMegs 1024 +exec iffa.cfg +set fs_game CPMA
- Launch Shortcut to host and announce/share the IP in discord chat.
Console Commands
Login with RCON
While connected to the server as a player
type in
\rconpassword theRconPassword
To change maps
\rcon map q3dm5
you can use
dir maps bsp to list all maps
\rcon map_restart 5
Restarts the map with a 5 second countdown
\rcon nextmap q3dm17 sets the next map after the map is won